Web: www.fishfotoworldwide.com -- E-Mail: fish@fishfoto.com
29/02/08 - Protect Your Passport From The Elements
More often than not when you hear someone tell you to protect your passport they are suggesting you protect in from theft. For me, protecting my passport from theft is a given, however protecting it from a torrential down pour or a spilled can if soda pouring down my leg is another thing.
I know a few people who had their passports destroyed due to being outdoors in bad weather. With a fear of getting hit with a fire hose while carrying my passport I have been using the Omniseal Waterproof Wallet Holder for a few years. At less then US$5 this simple item can protect you from having to explain to immigrations why and how your passport was destroyed while dancing through the Fountains of Rome.
You can find the Omniseal Holder at shops like REI and EMS in the U.S. or order them directly from REI at www.rei.com/product/492963
Below is a photo of my passport in the Omniseal Wallet Holder
Happy Flying!
--Click Image To Enlarge--
29 February 2008
Pocket City Guides - Lonely Planet, Your Guide To The World
Web: www.fishfotoworldwide.com -- E-Mail: fish@fishfoto.com
29/02/08 - Pocket City Guides - Lonely Planet, Your Guide To The World
Most travelers have experienced the frustration of heading to the bookstore to find an easy to use, small enough to carry, and resourceful guide to a city. Many travelers have found themselves on the floor of the books store surrounded by half-a-dozen books, and none of them give you all the information you want.
When I travel I am often in a city for a day or less, at times two days at most. The information I am seeking for my trips needs to be short, easy to find, and cut to the point. There are many good guides that go into depth about every nook-and-cranny of a city, these books are filled with superficial stories that get you interested but lead you no where, most irritatingly is these books cannot be shoved into your pocket (and most pocket guides are useless). In short order, finding a quick to use, easy to carry, detailed and informative travel city guide seemed like a lost cause to me.
Recently I became acquainted with Lonely Planet's "Encounter Guides." I have been using Lonely Planet's web site for years. I have read Lonely Planet books, and I have referred to Lonely Planet on Flying With Fish in the past, so with this in mind I went ahead and purchased a guide to look over. After 15 minutes of looking through the Lonely Planet "Encounter Guide" I realized I had found the pocket sized city guide I had been searching for!
Lonely Planet describes the Encounter Guides as "Discover Twice The City In Half The Time" and they are right! I have used these guides in cities I have traveled to in the past; cities I am acquainted with and they were fantastic. The layout of the books from start to finish allow for easy reference of anything you are looking for. Each book is broken up into logical and easy to find subjects, locations, sites and other useful information. The pack page of many guides is a city transit map, and you will find full colour maps throughout the book Included in the back page of each book is a compact pull out map of the city. The layout and easy design of the map makes it ideal for finding your bearings while on the move.
The physical size of the Lonely Planet "Encounter Guide" is not much larger than a passport. Obviously the book is thicker, but the 'footprint' is not much larger. The pull out full colour map that comes with the book is nearly the same size as a passport when it is folded up.
To make my life easier, I use a little Post-It Flags on each page that offers something of interest to me; I have about 18-20 Post-It Flags in each of these approximately 200 page books.
There are currently only 26 Lonely Planet "Encounter Guide" books, but they are producing more.
You can take an interactive tour of these books online at :
www.lonelyplanet.com/encounter
Below are a few images of the books. These images include the books in comparison to a passport, the pullout map with the book, a two page map display and the green Post-It Flags sticking out of the top
Happy Flying!
--Click The Image To Enlarge It--
28 February 2008
The Nickel-And-Diming Of Flyers - The US Airways Saga
Web: www.fishfotoworldwide.com -- E-Mail: fish@fishfoto.com
28/02/08 - The Nickel-And-Diming Of Flyers - The US Airways Saga
Normally my posts stay away from editorializing about travel. I try and stick to tips, equipment and related subjects. This post is slightly different. This post is about the nickel-and-diming of passengers.
A few weeks ago United Airlines (UA) changed it's baggage policy. Under the new baggage policy passengers flying on super-save fares would only be entitled to one checked piece of baggage. Your second bag would cost you $25. Under UA's new policy passengers on most fares would be entitled to two checked bags, as would all of UA's elite frequent flyers, and it's Star Alliance partner's "Star Gold" (*G) frequent flyers.
Over the past few years I have been a loyal flyer with US Airways (US). My status with US Airways' Dividend Miles has been Platinum, meaning I fly more than 75,000 miles per year with them. I have flown US throughout the United States, from Boston to Fort Lauderdale; through the Midwest, into Chicago and Milwaukee; through the bright lights of Las Vegas and countless Trans-Continental flights from Philadelphia to San Francisco & Los Angeles and New York's JFK to Phoenix. I have even chosen to fly US to London and Paris.
As a loyal US frequent flyer I have watched the airline make some bad choices in the past two years. Many of these bad choices were brushed off as growing pains related to their merge with America West Airlines (HP). The integration of HP and US first involved two incompatible reservations systems and two completely different fleets. Merging the reservations system took an extremely long period of time and alienated many frequent flyers, but I endured. The fleets still remain separate in many ways. There is US-East and US-West. "US" on the registration means you are flying a US aircraft, "AW" on the registration means you are flying an HP or "Cactus" aircraft. The seat maps often don't match up, making choosing your seats a crap-shoot, and certain expected amenities are not universal. A good example of this is all US Airbus aircraft have in-seat emPower outlets in every seat, both first and economy class and the HP aircraft do not generally have any in-seat power in any seat.
As the merger progress the management in Tempe promised it's frequent flyers more benefits. These "benefits" including the removal of the coat closet on some planes making it harder to hang up your coat. Other "benefits" involved the removal of a significant number of first class seats on many planes. This "upgrade" in the aircraft seating made getting an upgrade as an elite frequent flyer extremely difficult.
As the aircraft "upgrades" continued US reconfigured it's inter-continental Airbus A330-300 (A333) aircraft with the removal of the addition 2" of leg room in the economy section, in rows 6-through-21. What a great upgrade, yes?
Many airlines have switched to Buy-on-Board meals, often called "BOBs" This is annoyance, but it has become commonplace. Most airlines charge $5 for a snack box while US charges $7 and offers you less food for $2 more.
To further "enhance" your experience in booking tickets with US, they instituted a $10 fee for tickets purchased through reservations; a $20 fee for tickets issued at the airport or a city ticket office and even a $5 fee for some tickets purchased on www.usairways.com!
Now I'm sure you're saying, "Wow, what else can US Airways Nickel-and-Dime you for? Well let me tell you...........
If you are a Chairman's Club member, you're now paying for your drinks. Sure you are paying your annual dues for the lounge, but the drinks are no longer on the house.
In an absolutely stunning move, recently US Airways removed the "500 mile minimum" frequent flyer miles received while flying on any flight. You take a 100 mile flight you get 500 miles, you fly 498 miles you get 500 miles. This is standard with every airline I know of. Well, now US started a new policy, if you fly 271 miles, you get 271 miles. US built its self up on east coast business routes. These flights are high cost, high traffic routes, such as Boston (BOS)-New York (LGA); New York (LGA) - Washington DC (DCA) ; Charlotte (CLT)- Norfolk (ORF) and other short routes of under 500 miles. My common New Haven (HVN) - Philadelphia (PHL) flight is 157 miles and it now averages more than US$700 to fly it! That is a short flight on a turbo-prop aircraft and they won't do the 500 mile minimum.
Oddly enough, I can fly from HVN to San Francisco (SFO) via PHL for US$379......but if I get off in PHL, it's US$739. Now , I am no economist, but why does it cost US$360 LESS to fly an extra 5042 miles round trip? With this logic I should be getting 10,000 miles not 157 miles in my account because I am paying more for less miles.
Still think it can't get worse? Well, kick back and grab a can of soda, because I'm not done yet................ Yesterday afternoon, US Airways sent out an e-mail informing us that they will now be charging US$25 for a 2nd checked bag! That's right, a $25 for your 2nd checked bag.
How does this affect you? Well now airlines are not only charging heft fees to fly the, but all the hidden additional fees are just piling up. What do you get in return? You get less frequent flyer miles which means less award travel using your miles and must slimmer opportunities to reach an "elite status."
If for some reason the executives at the US Airways HQ in Tempe are reading this, let me sum myself up quickly here:
THIS IS NOT HOW YOU SHOULD TREAT YOUR MOST VALUABLE CUSTOMERS!
Happy Flying!
(on some other airline)
25 February 2008
Baggage Tag Identification Information - The Do's & Don'ts
Web: www.fishfotoworldwide.com -- E-Mail: fish@fishfoto.com
25/02/08 - Baggage Tag Identification Information - The Do's & Don'ts
You get a new bag, you pull out the baggage tag and you fill out your home address and phone number, it seems easy enough. Right? WRONG!
While standing at the check-in counters at airports, and the baggage carousel at the end destination point, I have a habit of reading people's baggage tags. Two things always amaze me, the first is the information people put on their tag, the second is the information people leave off of their tags.
When you are traveling the following is the most important information you should have on your tag
- Your name, preferably how it appears on your airline tickets
- Your contact phone number
- Your destination contact phone number if you are traveling somewhere your mobile phone will not be "roaming" with you
- Your e-mail address
Your contact phone number is very important. In this day-and-age, we all have mobile phones. Your mobile phone follows you, this means that if you are flying from Providence, RI (PVD) to Calgary, AB (YYC) and somewhere along the way your bag is delayed the airline can call you and let you know what it has arrived.
If you are traveling somewhere that your mobile phone may not work, such as Japan, which is on it's own GSM mobile phone system, that is GSM 3G only (that's right you GSM EDGE users, your GSM mobile won't work in Japan), you need an alternate form of contact information. List the phone number of your hotel or your business contact so the airline can contact you while you are in an area potentially inaccessible to your mobile phone.
When you are filling out your baggage tag the following information should NOT be placed on your baggage tag
- Your home address
- Your home "landline" phone number
Most people assume that their home address and phone number should be on their bags. The problem with exposing this information on your bags is that there are experienced thieves loitering in many airports reading luggage tags! When you have your home address publicly available on your baggage tag you are announcing to these seasoned criminals that you are not home! It happens more than you would think.
Why no home "landline" phone number? These numbers lead back to your address. I have sat in the lounge at an airport to test my theory and using www.whitepages.com/reverse-lookup searched the phone number on the bags next to me. What a shock, I immediately knew the home address of the guy next to me, as well as his wife's name. Now I have no intention of breaking into anyone's home, but as this guy left the United Airline's Red Carpet Lounge at JFK I saw him walk out with his wife. By the age of this couple, their kids have probably moved out, and by their address off 188th Street in Queens, New York, I know they live in a very nice upscale neighbourhood and their house would be totally unattended for at least a day as they were departing for LAX at 6:30am on United Airlines (UA) Flight 891. Do you want someone knowing this much information about you, just by reading your phone number in an instant while you standing in the airport?
On a more practical issue, if you get off a plane in Stockholm (ARN) and you live in Boston (BOS) and your bags are delayed, how will the airline calling your house help you?
For you members of the American Airlines (AA) AAdvantage frequent flyer program, even you basic members with no status, for US$20 you can order a set of customized AAdvantage luggage tags. These are very useful and simple to order and can allow AA to claim your bag and contact you directly! You can find details on these tags here:
http://www.aa.com/aa/pubcontent/en_US/productsGifts/luggagetags.jsp
So..............when getting your new luggage tags, remember to give useful information and NOT too much information!
Happy Flying!
18 February 2008
The Ultimate Ultra Compact Tripod For Traveling!
Web: www.fishfotoworldwide.com -- E-Mail: fish@fishfoto.com
18/02/08 - The Ultimate Ultra Compact Tripod For Traveling!
My goal when packing is almost always to get whatever I need packed into the smallest possible carry-on bag. This is a challenge that I face constantly. I hate checking bags, and I generally hate traveling with two bags as carry on. Why do I dislike two bags for carry on? I dislike it because it is one more bag I potentially need to be hauling while shooting something.
For years I have been searching for the perfect travel tripod. While I may not have found the "perfect" travel tripod I found a pretty damn good, and extremely cost effective, tripod that can meet a good portion of my quick-n-dirty travel needs.
To meet my needs for the past few years I have been using the Gitzo 0012 compact tripod, which was recently discontinued. The Gitzo 0012 is a compact profession tripod, it did a good job, but it was a bit big, it was not all that stable due to the restriction of the spread of the legs, it was heavy for it's size and hard to shove inside a packed bag.
Recently I have been leaving my Gitzo 0012 behind and wishing I had a tripod that was compact, lightweight and that could easily be tossed into a bag. My solution was an answer that was in front of my eyes very often, but I believed to fall under the "to good to be true" category"...................the solution? The Ultrapod II.
I know, the Ultrapod II looks like a toy, but I have tried it in various configurations with the Canon 1Ds and some lenses and it held the 1Ds in place, as advertised! These body & leg configurations where at the suggested weight threshold (and in some cases slightly over), according to the manufacturers suggested "maximum safe load." The Ultrapod II has a small multi-directional ball head and can be used as short table top tripod, or it can be laid against a pole or a fence and secured tightly into place using the supplied lashing velcro strap. Playing with both the tripod and "lashed down" set ups I used my Canon 1Ds, with NP-E3 battery, the Canon 50f1.4 with the Canon EF-12II macro tube, as well as the Canon 85f1.8 and Canon 14f2.8. All of these set ups put the UltraPod II over the suggested "maximum design load" or 4lbs and close to or slightly over the "maximum safe load" of 6lbs.
I have been extremely impressed with this little tripod!
How does the UltraPod II stand up to the Gitzo 0012? Let's see
Ultra Pod II
Cost: US$18.95
Folded Length : 7.5"
Weight: : 0.25lbs
Gitzo 0012 w/G1277M compact ball head
Cost of 0012: US$215 (now discontinued, the replacement is US$365)
Cost of G1277M : US$162
Folded Length (with head): 13"
Weight (with head): 2.1lbs
While the Gitzo 0012 has some great advantages over the UltraPod II, at a cost savings of US$358.05, a weight savings of 1.84lbs, and a space saving of 5.5 inches, I see the UltraPod II as a fantastic tool!
With many photographers, especially traveling photographers, using the smaller, lighter , lower center of gravity bodies, such as the Canon 40D/5D and Nikon D300 bodies, the UltraPod II is something I think everyone should explore.
I'll admit it, there are times I need, and use a full-size tripod. I have a few in the basement that are long,heavy, have extremely heavy ball-heads, and they have their purpose.........and that purpose is not to be easily carried around and used while shooting on the fly.
At under $20 , can you really go wrong with a compact travel tripod, that is versatile, has it's own ball-head and that can support up-to 6lbs very easily?
Below is a a photo of the UltraPod II supporting my Canon 1Ds w/Canon 50f1.4 and Canon EF-12II extension tube and a photo of the UltraPod II all folded up next to the 1Ds with Canon 85f1.8 just to show the size of the item.
Happy Flying!
--Click The Images To Enlarge Them--
16 February 2008
The No Jet Lag Photo Quick Course Seminar & Workshop - Come Join Me For A Day That Will Change How You Travel As A Photographer!
Web: www.comeflywithfish.com -- E-Mail: fish@fishfoto.com
16/02/08 - The No Jet Lag Photo Quick Course Seminar & Workshop - Come Join Me For A Day That Will Change How You Travel As A Photographer!
March 15 - Baltimore/Washington Area
March 16 - Manhattan
The No Jet Lag Photo Quick Course is a one day intensive seminar and workshop that will change how you hit the road and travel as a photographer!
Having traveled around the world, as an editorial, corporate and wedding photographer my experience and in-depth knowledge base as a "photographer in transit" is extensive. My extensive experience has taught me handle any situation I am faced with, from lights now showing to bad weather and no time to reschedule as well as packing and travel logistics. The most important skill I have learned and will pass on to you.................no matter what the obstacles are in your way, it is not your client's problem!
During the day long No Jet Lag Photo Quick Course you will learn the basics of travel through how to handle a wide range of real-world scenarios. Throughout the day I will cover a vast expanse of information ranging from choosing flights and fares to traveling with minimal equipment to photographing a corporate environmental portrait.
As I explain real-life situations I will also be demonstrating some of these skills on-site, such as the five minute corporate portrait and flying with a full camera, lens and lighting kit as carry-on baggage only.
Towards the end of the day we will go out in the city streets and put the information you have learned to the test! There is no point in just taking notes if you are not shown how to implement the information you have just learned. Try out your new skills while the information is still fresh in your head.
Some of the topics to be discussed in detail include the following
- Understanding the logistics of planning your travel
- Planning your "escape route" should your travel schedule be interrupted
- Learning to select your equipment based on "need" not "want"
- Learning to pack more effectively and efficiently
- Choosing "savings" over "comfort" (and vise-versa)
- Planning to maximize your effective time on the ground
- Planning for everything to go wrong on the road
- Creating the five minute editorial/corporate portrait
- Planning multiple quick set-ups with minimal gear for editorial/corporate shoots
- Understanding how to work in any available space
- Understanding how to deal with "reality" rather than "artistic vision" on deadline
- Learning to use the streets as your friend while shooting alone or with an assistant
Currently I will be holding two No Jet Lag Photo Quick Courses.
March 15 2008 in Baltimore/Washington Area
March 16 2008 in Manhattan
The fee for this seminar & workshop is $149
Full-time students may attend the seminar for $125
Interested in attending? Drop me an e-mail at fish@flyingwithfish.com
PayPal payments may be sent to Paypal@fishfoto.com. Indicate the date in the notes section of payment form to hold your seat. Register early as there are a limited number of seats available.
FYI: These workshops are aimed at supporting Flying With Fish and keeping Flying With Fish 100% advertising free!
--CLICK BELOW TO REGISTER & PAY BY PAYPAL--
Security Strap For Your Camera - Check Out The Slim, Comfy, Slash Proof Camera Strap!
Web: www.fishfotoworldwide.com -- E-Mail: fish@fishfoto.com
16/02/08 - Security Strap For Your Camera - Check Out The Slim, Comfy, Slash Proof Camera Strap!
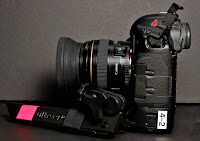
At the age of 32 I have now been using Domke Gripper Straps almost exclusively on my cameras for more than half of my life. I don't enjoy change, I tend to use the same things over and over again, from generally only wearing the same types of clothes to always packing the same candy on my trips (KitKat Bars) to sticking with the same camera strap year in and year out.
Why do I mention my discomfort for change? Because I think it is important to mention this at the start of a post about my switching cameras straps from the tried, tested and known Domke 1" Gripper Straps to PacSafe's CarrySafe 100 straps. I have referred to PacSafe many times in the past in various online forums, however I have always referred to PacSafe's outstanding metal-mesh bag protectors, never their straps..........in fact I had never really paid any attention to PacSafe's straps until last week!
I must credit my introduction to the PacSafe CarrySafe 100 straps to Calgary, AB, based photographer Dan Bannister. Dan is a globe hopping travel and commercial photographer who participated in my No Jet Lag Photo Workshop to Hong Kong, and he had the PacSafe CarrySafe 100 straps on both of his camera bodies. Once I saw these straps I was intrigued by them. Why was I intrigued? Well for starters they are slash proof which makes them more secure for walking in dense area that may leave you prone to a professional thief slashing your strap as they yank down on your cameras. Secondly these"secure straps" remained thin in profile, light in weight and flexible when wrapped around my wrist rather than other security straps I have seen. Every other "security camera strap" I have seen tend to be wide and seem to scream "I am a tourist," these straps are the complete opposite of that.
The PacSafe CarrySafe straps are made from a very durable nylon with a high-tensile steel wire running through the entire strap. By having the steel wire run as an uninterrupted loop through the construction of the strap the wire runs up the front and back of the strap making it difficult to be slashed quickly and it also secures your camera if you sit down to eat and loop the strap around your chair or table......with a quick yank your table or chair is going for a ride which makes theft of a camera very difficult.
The PacSafe CarrySafe straps have some very subtle design features that really stand out to me as a user. I love that the ends of the straps, that you use run through the camera's strap lugs are cut in in a triangular shape. Buy having the strap ends triangularly shaped makes it much easier to attach them to your camera. Attached each strap took me less than 3 minutes , rather an an average of 10 minutes with the Domke Gripper Straps.
To make your strap a tad more secure, these straps also have a "lock / unlock" latch on the D-ring. I purchased two straps, one has this extra security feature which I love, while the other strap did not. By model number and item number, these are considered identical products, so I am guessing one is an older model of the strap. If you can , look for the PacSafe CarrySafe 100 with the "lock / unlock" feature it is a fantastic little detail which should not be overlooke. From an ergonomics stand point, I need my straps to be comfortable, whether they are on my shoulder, on my neck or wrapped around my wrist. These straps meet my needs and exceed them!
Only time will tell if I will stay with these straps over my old habit of buying Domke Gripper straps. At $19.95 the PacSafe CarrySafe 100 costs about the same as the Domke 1" Gripper Strap, feel about the same as the Domke, while offering an additional source of security for protecting camera equipment.......something the Domke straps do not offer.
Below are a few photos of the PacSafe Carry Safe 100 strap. The first image is the PacSafe CarrySafe side by side with my Domke 1" Gripper on Canon 1D series bodies. The second image is of the CarrySafe 100 on my body, the last two are detail images of the triangle-shape at the end of the strap and the strap's lock/unlock feature.
Although I have just begun to use my PacSafe CarrySafe 100, I can already tell you this.....I highly recommend looking into purchasing these straps for your equipment!
Happy Flying!
-Fish
--Click On The Image Below To Enlarge It--
15 February 2008
Travel Underwear Saves Space While Flying By The Seat Of Your Pants
Web: www.fishfotoworldwide.com -- E-Mail: fish@fishfoto.com
15/02/08 - Travel Underwear Saves Space While Flying By The Seat Of Your Pants
When I pack light, trying to carry as much as I can in only a legal carry-on backpack and a legal "personal item," I try and shed as much excess bulk as I can. An item that most people ignore as "excess bulk" is underwear. Don't laugh, you can save space for at least one extra medium lens, or an extra flash, by eliminating excess underwear!
As travelers we tend to pack a pair or underwear for everyday we are on the road, which makes sense for hygiene and comfort reasons. For years I packed white Hanes boxers in my bag and threw out a pair as I was done wearing them to gain space. This sort-of-worked for me, until it dawned on me that I while I was gaining space as I traveled, I was losing space at the start of my trip! Well for my last journey I tried out a nice idea and purchased two pairs of "travel underwear."
What exactly is travel underwear? It is underwear that you can wash in your hotel room and quickly air dry in your hotel room overnight and wear the next day! This underwear is light weight, quite comfortable, itch resistant and it takes up very little space when packed. I was hesitant that it would really be as comfortable and dry as quickly as advertised, but my hesitation went away quickly and now I can't imagine how I survived on the road without this essential item in the past!
The pair of travel underwear I tested out was the Eastern Mountain Sports (EMS) Techwick Boxers. This underwear is made of an odor and bacteria resistant fabric that is extremely light weight. The ability to save space and wash-and-wear overnight (less than 4hrs to dry if you really wring them out good) is fantastic! At $20 a pair they are worth every penny.
Two other companies that make travel underwear are Tilley Endurables and ExOfficio. I plan on trying these other brands of travel underwear as well on future long haul journeys.
Happy Flying!
-Fish
--Click On The Image Below To Enlarge It--
14 February 2008
Flying With Open Seating - The Cattle Call
Web: www.fishfotoworldwide.com -- E-Mail: fish@fishfoto.com
14/02/08 - Flying With Open Seating - The Cattle Call
With today being Valentine's Day, my post was inspired by Southwest Airlines (WN). Why Southwest Airlines? Simple, the airlines New York Stock Exchange symbol is "LUV" and Southwest Airlines calls Dallas Love Field it's home. OK, not so romantic, but it's the best I can do tying Valentine's Day into flying.
Many European low cost carriers (LCC) have done away with assigned seating. This system of boarding has moved through the Asian LCCs and is most notable in the United States on Southwest Airlines. The biggest problem we as photographers face in a "cattle call" is not only seat choice and comfort, but we run the risk of losing overhead bin space.
More often than not most photographers I know travel with backpacks over the legal carry on weight limits. We do all sorts of things to get our bags past the weigh in check for carry on baggage. We take bodies and lenses out to carry them on our shoulders, stuff lenses in or pockets, take our laptop out and pretend to be checking out connecting flight as the bag is weighed all in an effort to get the bag on board (well this happens mostly happens in Europe and Asia). Once we get past security and up to the gate we reload our bag and try and find a spot in the overhead bins.
While we can place bags at our feet under the seat in front of us, realistically, it is difficult to get a Think Tank Airport Security, LowePro Nature Trekker or Mountainsmith Parallax under the seat in front of you (although I have), so our bags must go in the overhead. Making the problem more difficult is the narrow overhead bins on the all too common Boeing 737-series aircraft flown by many LCC airlines (the airbus A320-series bins tend to be a bit bigger) which makes the space in the overhead bins even more important.
The best way to avoid having a problem is to check in online. When flying on Southwest Airlines I try and check in 24 hours in advance at home and print my boarding pass. I have also checked- in online, then picked up my boarding pass at the airport upon arrival if I am unable to print my boarding pass. By checking in as soon as possible you end up with the highest boarding zone in an A/B/C or 1/2/3 boarding system Even if you are the last person to board in "Zone A" you are still on board before all the "Zone B" and "Zone C" passengers. While this may not be ideal, it still allows you to quite a bit of overhead bin space.
Some airlines, not many, but some, including Southwest Airlines have a media pre-boarding policy. This policy is for credentialed media, however as a professional photographer with a bag loaded with professional equipment, you can at times have the gate agent allow you a pre-boarding card to allow you on to secure your gear ahead of the rest of the passengers. You will board after all the wheelchairs and kids and those needing help, but you still board ahead of Zone A. There are some restrictions to this, but it is helpful at times on a very full flight when you have a bag loaded to the maximum capacity it will hold and you cannot have it checked under.
Think ahead, plan your flights. When you can book flights that have lighter passenger loads. For U.S. flights you can check multiple dates and flights for passenger loads to make an educated case on passenger loads by visiting Seat Counter, www.seatcounter.com Traveling this way, when possible can really cut down on stress!
For some quick entertainment on how to board with less stress during an LCC's Cattle Call Boarding visit Southwest Airline's Boarding School at www.southwest.com/boardingschool
Happy Flying!
-Fish
--Click On The Image Below To Enlarge It--
10 February 2008
Use The International Dateline To Your Advantage
Web: www.fishfotoworldwide.com -- E-Mail: fish@fishfoto.com
10/02/08 - Use The International Dateline To Your Advantage
Do you sometimes wish you had more than 24 hours in a day? Wish you could maximize your travel and cram in more work time? Believe it or not you can**!!!
**You can sort of, in theory, technically on paper this is correct
For those of you who have traveled across the International Date Line you know that when flying from Asia to North America you can land long before you have taken off (according to the calendar). It's always fun to take off from Nagoya, Japan (NGO) and land in Honolulu, Hawaii (HNL) 12 hours before you departed.
Using the International Date Line I have managed to, on one single calendar date, depart Hong Kong (HKG), head to Incheon (ICN), shoot feature images in Nagoya (NGO), have a meeting in Honolulu (HNL) and grab dinner in Los Angeles (LAX) before flying home. To handle this schedule I had to very carefully plan my flight schedule and fly three overnight "red-eye" flights to jam it all in.
This past week I planned my schedule to be able to handle two completely different photo shoots, on two continents, with the first shoot ending "after" the second one "began." Confusing? I know, reading it can be confusing, but let me explain. On the 8th of February I started my day at 7:00am in Hong Kong, I was out shooting street feature photos by 8:00am and finished up shortly after 2:00pm. At 6:15pm on the 8th of February my flight from Hong Kong (HKG) to Vancouver (YVR) departed........I arrived at YVR at 1:30pm on the 8th of February and I met the groom I was off to shoot an engagement session with shortly before 2:00pm.
By carefully planning my schedules, I was able to shoot two completely different jobs, in two different countries, on two different continents, on the 8th of February. Street feature images in Hong Kong, China and an engagement session in Vancouver, BC, Canada.
I enjoy working this way. By starting at the furthest point and working my way backwards I can shoot more in less time. This actual maximization of my time is not theory. What I do is lose a day traveling west over the International Date Line and then gain my day back travel each across the international dateline on the way home. By following the path of sunrises and timing my flights I can often do a significant amount of work on the ground in the span of four days.
If you're interested in learning how to carefully choose your flights departure and arrival times, to maximize your time, drop me an e-mail at fish@flyingwithfish.com or you're interested in learning in-depth information on traveling as a photographer, join me for my No Jet Lag Workshops. You can find out the details of these workshops online at www.comeflywithfish.com
Below are two images shot on the 8th of February 2008, the first in Hong Kong and the second in Vancouver, BC.
Happy Flying!
--Click The Images To Enlarge Them--
03 February 2008
Travel Rituals and Superstitions
Web: www.fishfotoworldwide.com -- E-Mail: fish@fishfoto.com
03/02/08 - Travel Rituals and Superstitions
The more I travel the more I find my travel habits are less like habits and more like rituals and superstitions.
The more I travel the more I realize these different idiosyncrasies that manifest themselves during my packing process and my travel process. For starters there is my wife's favourite ritual........the batteries. I will charge and check my batteries obsessively before a trip. I can be taking a 50min flight down to Philadelphia (PHL) for 3 hours on the ground or taking a 4 day, 20,000 mile journey around the world, and I will do the same obsessive checking and rechecking of my batteries.
Once my bag of gear has been laid out, inventoried checked, rechecked and packed, I will check my bag's contents probably 3 or 4 more time before I walk out the door. Why? I have no idea, I know my kit is complete when I walk out the door, from gum to DVDs to laptop and cameras and gaffers tape, I know it is all in there. Does that stop me from waking up at 1:00am to stick my head in the bag again? Nope.
When I have an early flight in the morning and I am waking up between 3:00am and 9:00am to catch a flight I will get out of bed at least a dozen times over the span of 15 minutes to check the alarm and make sure it is on and the time is correct. I'll get in bed, pull the covers up, stick my head on the pillow and promptly pop back up , walk across the room and check that the alarm is on and the time is correct again.
Once I have arrived at the airport I have few rituals or superstitions. The one consistent ritual that has taken place on every single flight I have taken since late 1991 is listening to the same song. As soon as I get into my seat I cue up the start of Van Halen's "Top of he World." It was a tape at first, then a CD, now an iPod, but it's always the same song, in the same spot ready to go...........ready to go for what? I'll tell you. As soon as I hear the engines go full-speed-ahead once we're on the runway, the break gets released and I can feel the plane starting to roll down the runway I hit play. Every flight, no matter how short the flight, no matter what, the plane
starts to roll and all I hear is Van Halen's "Top of the World."
I figure I have always listened to "Top of the World" and none of my flights have had anything go terribly wrong. Why change this ritualistic superstition, right?
What are your rituals and superstitions? Come on, you know you have some, post them in the comments and let's hear 'em!
Below is a YouTube video of Van Halen's "Top of the World"
Happy Flying!
01 February 2008
The No Jet Lag Photo Quick Course - Getting Warmed Up In Mystic, Connecticut
Web: www.fishfotoworldwide.com -- E-Mail: fish@fishfoto.com
01/02/08 - The No Jet Lag Photo Quick Course - Getting Warmed Up In Mystic, Connecticut
This past Monday Walter Van Dusen hosted the Third Annual Mystic Get Together, in Mystic Connecticut. It has been a pleasure to have participated and in the first event, of maybe 20 photographers through this years event with 120 photographers. From a small conference table three years ago to a stage, surround-sound, and some funky lighting a huge ballroom this year it has been fantastic to watch this even continue to grow.
For the second year in a row I kicked off the day of learning at 8:00am, discussing the ins-and-outs of travel. This' years' hour presentation was a a nice warm up to my two One Day No Jet Lag Quick Courses.
With a condensed schedule I quickly covered choosing bags, making your bags less attractive to airport thieves, tips on packing, picking your flight routes to maximize your time, choosing seats and how to understand airline fare classes to search for the lowest airfare.
To learn an in-depth knowledge of how to travel more effectively as a photographer check out The No Jet Lag Photo Quick Course, March 15th in Baltimore and March 16th in New York. http://comeflywithfish.com/oneday.html
Thanks again Walter for another great Mystic GTG!
Below are a few photos shot by Jamie Wexler and Earl Christie during my presentation.
Happy Flying!
--Click Images To Enlarge Them--
Subscribe to:
Posts (Atom)