Showing posts with label Mountainsmith Tour. Show all posts

28 October 2008

The Manfrotto 3373 : The Perfect Traveling Light Stand

Web: www.fishfotoworldwide.com -- E-Mail: fish@flyingwithfish.com

28/10/2008 - The Manfrotto 3373 : The Perfect Traveling Light Stand

Traveling with lighting equipment can be challenging. While it is easy to swap out large studio lights for small strobes and there are many lighting accessories for small strobes, there is still the need to travel with light stands. Light stands tend to be long and difficult to pack, with very few options available to be transported as carry-on baggage.

For the past four years I have happily carried my light stands on-board flights with me. My light stands are sometimes in the bag I am using, and more often than not attached to the outside of the backpack I am wearing. These rugged, compact-yet-full-sized, light stands are the Manfrotto 3373.

What makes the Manfrotto 3373 light stand ideal for the traveling photographer? For starters the 5-section light stand folds down to a compact 19.3", yet extends up to a maximum high of 6ft 2". At a lightweight of 2lbs the light stand can comfortably hold 4lbs. Working in right spaces with compact lights is easy with the 3373 having a maximum footprint of 3ft 3".

Each of my lighting kits has it's own set of Manfrotto 3373 light stands. I keep three in my LowePro Pro Roller II case that contains two Lumedyne heads, a Nikon SB-28dx, power pack, two batteries, set of Pocket Wizards, cables, soft-boxes, grids, etc etc. This full-size studio kit fits in a single checked bag that weighs a mere 48lbs. For the rest of my lighting needs, I keep an additional three Manfrotto 3373 light stands.

The three Manfrotto 3373 light stands that are not packed with my Lumedyne kit are used in a variety of set ups depending on my needs. The compact size of these light stands allows me to insert them in the outside pocket of most backpacks and secure them using the backpack's compression straps. While I frequently travel with a single light stand for many shoots, the design and size of the Manfrotto 3373 allows me to easily stack two together and travel with me inserted in a backpack's external pocket, secured by the bag's compression straps.

I have frequently stocked an entire mobile studio kit inside the compact Mountainsmith Parallax backpack, thrown two light stands on the outside of the bag and hopped on a flight. Earlier this year in 3.5 days I flew through 5 countries (shooting in 4 of them) on three continents, crossing the Atlantic and Pacific Oceans, with a Manfrotto 3373 attached to the outside of my North Face Surge backpack. Quick shoot down in Philadelphia? Pack up a Mountainsmith Day pack and attach the light stands to the securing straps to the bottom of the bag, or in the side pocket and use a carabineer to secure the stands to the shoulder strap.

Fearful of the lightweight light stand tipping over with some wind while shooting outside? There is a simple solution, I often stop by a shop such as Home Depot and pick up a few US$2.00 cinder blocks to toss on the legs when using full-size lights. When using small strobes, such as the Nikon SB-28dx Speedlights I simply place my bag on one of the legs to weigh it down.

As for flying with the Manfrotto 3373, the ultra compact size of the light stands draws virtually no attention to its self. As the light stand is smaller then international carry on restrictions, airport security almost never questions the light stand being attached to the exterior of the bag. The light stand attached to my bag has only once been questions by an airline........and that was a United Airlines flight attendant whose hobby was photography. She wanted to know what light stand I had attached to my bag.

The more I travel, the more I shoot environmental portraits on the road, the more I grow fond of the Manfrotto 3373.

Below are a few photos of the Manfrotto 3373 at work and packed as carry-on for work.
Photo #1 : 3373 set up with a Photoflex Q39 softbox for a corporate shoot
Photo #2 : Two 3373s attached to the outside of my Mountainsmith Parallax
Photo #3 : A single 3373 attached to my North Face Surge backpack
Photo #4 : A single 3373 light stands attached to my Mountainsmith Day pack.
Photo #5 : A single 3373 lashed to the bottom of my Mountainsmith Tour.
Photo #6 : Two 3373s set up in a tight space on a location shoot


Happy Flying!
--Click Images Below To Enlarge--


23 September 2008

Simple Baggage Solutions : Make Your Own Modular System

Web: www.fishfoto.com -- E-Mail: fish@flyingwithfish.com

24/09/2008 – Simple Baggage Solutions : Make Your Own Modular System

There are dozens of modular bag systems on the market today that are used by photographers. These bags are for general packing solutions, photography specific solutions and a hybrid of both. As I have been trying to reduce the gear I travel with for 'general shooting' situations I had started to investigate a variety of bags possibilities for more than a dozen manufacturers.

While researching a variety of bags one night I started staring at a set of bags I have used, trusted, loved and preached about often on Flying With Fish, and almost everywhere else I discuss bags. These bags as you frequent readers may have already guessed are my Mountainsmith bags.

To make a simple carry on + roll-aboard that could carry everything I'd need for a 'simple kit,' I turned to the Mountainsmith Correspondent roll-aboard bag, The Day and The Tour. These three bags can be easily combined into two bags for short trips, around the corner or around The World.

When initially setting up this configuration I removed the top 'cube' from inside the Mountainsmith Correspondent and sized up the Mountainsmith Tour to see if it would easily fit inside. Once I determined that the Tour would fit into the open slot, normally filled by a 'cube,' I was off and running.

For my needs, this how I packed for travel:

-The Day : 4 magazines (Photo District News, Airliner World, National Geographic, The Economist); sleeve of 10 DVDs, Newswear pouch with my Sony PSP Survival Kit (swapping the Skullcandy headsets for the Sony MDR-NC22 headsets), Vector 100watt emPower inverter; 15" MacPowerBook, PowerBook AC power supply;

- The Tour: Domke 4-slot insert (the original non-padded chocolate brown insert, how many of you remember when the bags were only brown?); PSP power supply; Garmin GPS; GPS accessories; Think Tank Cable Management 10 pouch (for all my random photo & computer accessories, mobile phone chargers, CF card reader, thumb-drive, etc, etc), Energizer rapid "AA" battery charger

- The Correspondent
(In The 'Cube') : Canon 5D w/BG-E4 grip; Canon 20D w/BG-E2 grip; Canon 16-35f2.8L; Canon 70-200f2.8L; Canon 24f1.4L; Canon 50f1.4; Canon EF-12II extension tube; Canon 580ex; Think Tank PeeWee Pocket Rocket (CF Card Wallet) ; two spare "AA" packs of rechargeable batteries, two spare BP-511 batteries; Canon ETTL Cord; Ilford Anti-Stat cloth

(In The Pocket Intended For A Laptop & Magazines): two button down folded shirts (folded and inside the laptop sleeve), 2 pairs of a socks, 2 pairs of boxers, belt.

(In The Inside Flap Clear Pockets) Hefty 1-quart (TSA Approved) bag with toiletries, stick of deodorant , two Canon battery chargers for the BP-511 batteries.

(In The Main Compartment): one pair of folded pants (placed above 'The Cube' behind The Tour)

With all of my gear with me, set up in easy to access and configured in a way that is easy to both unpack and repack, I am able to get to work easily. Once I am ready to get to work I remove the gear I'll be shooting with and set up my Mountainsmith Tour pack. Generally I'll head out with a 16-35f2.8 attached to my 5D and a 50f1.4 on my 20D, leaving the 24f1.4 & 70-200f2.8 in The Tour, along with a Canon 580ex, spare batteries, a Think Tank PeeWee Pocket Rocket and an ETTL cord.

The items that were in The Tour get transferred to 'The Cube' and off I go.

I have now traveled with this kit of three transcontinental trips to shoot projects and weddings and the set up has been perfect. The size and weight are easy to handle, the design function of all three items are ideal for traveling fast and light, while allowing me to carry everything I need to make sure I arrive with everything I need to do my job.

Overall, as I have mentioned time-and-time again, I trust my Mountainsmith products (they even make my mobile phone belt holster for my Razr and iPhone, the Mountainsmith Amp). The products Mountainsmith makes are reliable and durable, the space is ample, the bright yellow interior of the waist packs are easy to work out of , the zippers are strong and at the end of the day I know their products will take anything I can throw at them (including being left at the stairs, loaded with my gear, when boarding a regional jet or turbo prop flight).

Next time you're looking for a complete carry-on solution think outside the box and make your own.........maybe also check out the Mountainsmith line of bags for your needs.

Below are two photos of my Mountainsmith kit

Happy Flying!
--Click Images To Enlarge--


23 July 2008

What Mountainsmith bags does Flying With Fish personally travel with? Lets find out!

Web: www.fishfotoworldwide.com -- E-Mail: fish@flyingwithfish.com

22/07/2008 - What Mountainsmith bags does Flying With Fish personally travel with? Lets find out!


With the recent Mountainsmith Bag giveaway contest, during the 'The Great Mountainsmith Bag Give Away From Flying With Fish' I received a few e-mails asking me if I chose to use Mounatainsmith bags because of of the company's giveaway on Flying With Fish.

I dismissed the first email or two, but when the next three rolled in I decided I should probably address this question. In fact I have been using Mountainsmith bags for my camera equipment for many years...........nearly a decade now! Throughout this past year I have detailed my use of Mountainsmith bags in great detail, including a five part series on the Mountainsmith Tour back in January.

As a photographer who travels, I have used Mountainsmith bags around the world and chose to accept Mountainsmith's offer of giving away a few of their bags because I am a huge fan of their products!

How big of a fan am I of the Mountainsmith line of bags? To demonstrate my enjoyment of their bags I loaded up some of my collection into the back of my 1990 Volvo 245 and shot a picture of my collection (missing from the photo is my bright pink Mountainsmith Tour).

The Mountainsmith bags in the photo below from left to right are:

- The Day : The Day is a fantastic 'hit the ground running bag' to carry multiple carry configurations for shooting, lighting, taking your laptop to the library (it's even good for hiking).

- The Parallax : I used The Parallax as the only bag I brought with me while shooting a project where I flew around the world 1.5x in 4 days! Great bag to carry everything, while still being carry-on legal and small enough to wear on my back while shooting!

- The Cube : The Cube is great for not only packing your clothes for travel, like a duffel bag, however I use mine to disguise checked camera equipment. When I am forced to check camera gear in cases such as the Pelican 1514, or long lens shipping trunks, I place these cases inside the The Cube. When The Cube comes around the baggage carousel no one gives it a second glance as it looking nothing like what you'd expect to find camera equipment in. The bright neon green colour is to allow me to quickly and easily spot my bag among the sea of black ballistic-nylon bags in the baggage area

- The Correspondent : The Correspondent is the newest bag in my collection, and after some heavy travel in the past few months it has proved to be fantastic rolling bag! The unique interior configurability, while taking getting used to, has been great, and for many trips this bags design has allowed me to travel with one bag only for gear, clothes, laptop, etc.

-The Tour (in front of The Cube): The Tour has been by far my most used Mountainsmith pack. The Tour is a lumbar pack designed for hiking, but for me it is the do it all bag. I have at least half-a-dozen configurations of this pack. The Tour coupled with a 'Newswear Pouch' can meet nearly any shooting situations needs. The bright yellow interior is also ideal for not loosing little black lens caps, black cords etc etc........I also have a bright pink Tour which my daughter bought me that is not shown in the photo

- The Amp (in front of the Tour) : The Amp is a small mobile phone holster which I use every day to carry my Motorola Razr around on my belt. I wish they made a sleeve large enough for my Blackberry! The Amp's oversized top-flap and excessive use of Velcro ensures my phone is always in its case even when constantly being banged by camera equipment, lens pouches or waist packs. It has been by far the best mobile phone holster I have ever used........and I have used mine for over a year now since I first spotted the Amp at the Kittery Trading Post up in Maine.

Well there you go, my regular line-up of Mountainsmith bags (and yes I have others that are old and worn out elsewhere, but I wasn't emptying my entire closet into the back of my car)..........and why the Volvo again (I used the bumper in this week's post on the Sony PSP), I just felt like photographing my car for no real reason :0)

Happy Flying!

--Click Image To Enlarge It--

26 June 2008

The Great Mountainsmith Bag Give Away From Flying With Fish!

Web: www.fishfoto.com -- E-Mail: fish@flyingwithfish.com

26/6/2008 - The Great Mountainsmith Bag Give Away From Flying With Fish!

As a photographer I have relied on Mountainsmith bags to carry my gear for years. I currently use five Mountainsmith products on a regular basis (well really six, since I have two Mountainsmith Tour packs). I have been writing about my Mountainsmith bags since I started Flying With Fish, and even dedicated a whole week to the versatility of the Mountainsmith Tour.

My consistent references to Mountainsmith products have caught the attention of Mountainsmith and they have very graciously offered me three bags to give away to the readers of Flying With Fish!

What do you have to do to win one of these Mountainsmith bags? Simple, you need to tell the 'worst case scenario' you have experienced on the road and how you overcame it! In 400 words or less, I need the details of what and where your worst case scenario happened and I need the details of how you overcame the situation to keep on going (FYI: telling me you ended up in jail is not a solution to overcoming a travel problem).

Be honest! Any stories that seem a little far-fetched will be verified; also I have read the "worse case scenario" series of books, so no lifting material from there; I also read Flyer Talk and can search the archives so no ripping off material!

So what's at stake?

First Prize : The Mountainsmith Parallax photo backpack.
My Mountainsmith Parallax carried everything I needed to travel around the world 1.5x times approximately 4 days while shooting a project for an airline. The backpack held everything I needed to pack, it is legal for carry on with virtually every airline.....and.....it is compact and comfortable enough to be worn while shooting!

Second Prize: The Mountainsmith Day Recycled lumbar pack
I love that Mountainsmith produces bags from recycled material. This is very forward thinking and it helps reduce our individual footprint on the planet. My Mountainsmith Day is used as a small satchel for both my 15" PowerBook and 13" MacBook. I also use the Day as my 'hit the ground running' bag, stocked with a small kit of lenses and basic lighting accessories.

Third Prize: The Mountainsmith Cyber II Recycled Pouch
These compact pouches are fantastic for carrying a point & shoot, flash, or small lens. I have a used a Cyber II (large) to hold lenses such as the 16-35f2.8 and 85f1.8 on my belt when traveling one body and only two small lenses.


...So think back on your travels and write down the details of your 'worst case scenario' and how you overcame the problems to keep on trudging along. Once you have correctly recalled the details of your ordeal and triumph send me an e-mail of 400 words or less! The e-mail address your entry should go to is : traveltips@flyingwithfish.com

THE DEADLINE FOR ENTRIES IS MONDAY THE 7TH OF JULY! Winners will be announced on the 9th of July.


You may enter once. All entries must have your full first and last name. Anyone enters twice will have both entries disqualified.

…………..and let’s all give Mountainsmith a big round of applause for supporting the readers of Flying With Fish!

Happy Flying!


Small Print:
- Flying With Fish is in no way affiliated with Mountainsmith
- Mountainsmith is in no way affiliated with Flying With Fish
- Judges decisions on winners is final
- Disqualification is at the sole discretion of judges
- Prizes may be swapped for an equal prize at the discretion of Mountainsmith
- Winning entries may be posted, with winners’ names, on Flying With Fish
- Entries that tell me they encountered someone releasing the dogs; or the bees; or the dogs with bees in their mouth and when they bark, they shoot bees at you......will get a good laugh, then be disqualified.

23 June 2008

The Mountainsmith Correspondent : A Versatile, Rugged, Do-It-All, General Purpose Rolling Camera Bag

Web: www.fishfotoworldwide.com -- E-Mail: fish@flyingwithfish.com

23/6/2008 - The Mountainsmith Correspondent : A Versatile, Rugged, Do-It-All, General Purpose Rolling Camera Bag

For years I have used and trusted the Mountainsmith Tour pack as my 'do it all' shooting bag. Having used the Mountainsmith Tour waist pack as a versatile multi-purpose platform, as well as the Tour's 'larger brother' the Mountainsmith Day pack and the Mountainsmith Parallax photo backpack, Mountainsmith seemed like the logical option when searching for a new soft-sided rolling camera bag.

When looking for a new soft-sided rolling camera bag I kept in mind that there is no such thing as the 'perfect bag,' however the Mountainsmith Correspondent came across as the most versatile rolling camera bag. When choosing my equipment I generally choose versatility over all other deciding factors. In the business of traveling as a photographer every assignment is different, ever need is different, every packing situation is different, and versatility is key.

Having now used the Mountainsmith Correspondent for approximately two months, I have used this rolling camera bag on a variety shooting and travel situations. From 'valet' checking the Correspondent on small regional jet flights, to rolling it down the aisle of a Boeing 747-400 to right now, as I write this review of the Correspondent while sitting on a Northwest Airlines Airbus A320 with the bag in the overhead above me in Seat 3D, the bag has exceeded my expectations.

What makes the Mountainsmith Correspondent different? For starters the versatile design of the bag has at times let me travel with only this bag. No backpack or secondary camera bag. I can do my job in just this one bag and a waist-pack/belt system (which is what I wear and work out of when shooting). Being able to place everything I need inside a single bag when getting on a place is great.

A unique feature of the Correspondent is it's interior main compartment. The interior main compartment can be configured for all camera equipment by utilizing two independent and padded zippered 'cubes.' These 'cubes are secured by heavy Velcro on three sides. The interiors of the ‘cubes’ come with a variety of semi-rigid dividers that allow you configure each 'cube' individually. The padding around each 'cube' is not space consuming, however it is significant in its protections abilities. Having been forced to 'valet' check my Corresponded loaded with camera equipment on a number of regional jet flights (and a turbo-prop flight) I have had not once single piece of equipment damaged. The Correspondent is now one of only three bags I would trust to 'valet' checking on a regional jet (although I would still never check this bag as baggage with camera equipment in it, that is still reserved for only Pelican cases). If I packed a little tighter could add a third body, and two more 'short' lenses.

In the two fully packed cubes can hold a significant amount of equipment. Generally my wedding photography kit consists of two full-sized bodies, 8 lenses, a flash (sometimes two), an ETTL cord, battery CF card wallet, and 3 spare sets of "AA" batteries

The Correspondent's design of two individual cubes makes configuring the bag for multi-purpose use very easy. For short overnight-trips where my camera equipment needs are not extensive, or when traveling to meetings, I can remove the top 'cube' leaving only the bottom 'cube' in place. With this set up I generally place two full-size camera bodies and two lenses (16-35f2.8 & 70-200f2.8) in the lower 'cube' while packing my clothing in the upper open interior compartment. Being able have one bag do double duty is fantastic. This set up for minimal camera equipment and space for clothes is also nice for a weekend getaway where you want to pack some gear, but don't need all the usual trappings of traveling as photographer.

The front pocket of the Mountainsmith has a full-size laptop slot that can accommodate a laptop up to 17". While many rolling camera bags are missing a laptop slot, or only have a smaller laptop slot, this is a nice feature. Along the front flap of the exterior of the front pocket are slots for your pens, as well as a small mesh pocket which I tend to use for loose change and my keys. Having this mesh pocket at the top of the flap makes accessing my keys easy when the bag is loaded and I'm wandering through the parking lot looking for my car.

When traveling with a full camera kit with me to shoot a job, I often use the large front pocket to pack my clothes. In this front pocket I place my folded shirt inside the laptop slot to keep them neat and unwrinkled. The main compartment holds two t-shirts, two pairs of underwear, two pairs of socks, the laptop slot holds two dry-cleaned (folded) shirts, and a space pair of pants can be folded and placed in the main compartment over the 'cubes.' This is actually how I am packed at the moment for my travel over the next two days.

The exterior wall of both the 'cubes' and the main pocket are lines with see-thru plastic pockets. I tend to use these pockets for space camera batteries, flashlight, at times travel documents and other random items. With the Canon 5D/20d series bodies (with extended battery grips, roughly the same size as a Canon 1D or Nikon D3 body) I use the lower pocket on the wall of the main pocket to hold four compact battery chargers and a Manfrotto 3007 mini-tripod, while the pockets on the flaps of the 'cubes' can be a bit tight, they are a good place to store lens caps, body caps and a CF card wallet.

When the front pocket is packed with clothing I obviously travel with a backpack or other shoulder bag to accommodate items such as my laptop. Depending on my needs, this bag tends to be either North Face Surge when I need to carry more gear or a Mountainsmith Day when I need less gear. Despite the Mountainsmith Day's compact side it easily holds both a 13" MacBook or a 15" MacBook Pro.

On the top of the bag, under the business card slot, you'll find a small zippered pocket. This pocket is an idea place to store your spare lock and zip-cable. I like keeping my lock-and-cable combo in a location that requires no digging around so I can quickly get it out and lock up my bag when I sit down.

From a security point of view, the design of the zippers make locking the bag very easy. I prefer zippers that are durable rather than 'tied rope' as quite a few camera bags have, as this zipper style appears to be much harder to breach.

The exterior front of the bag is an 'open slot' to carry a tripod, along with a lashing strap to secure the tripod. Since I don't travel with full-size tripods, and rarely if ever secure a tripod to the exterior this feature is lost on me, but I know quite a few photogs who do, so I thought it was worth mentioning

Just above the tripod slot are three lash tabs, this is a feature I have used a few times. I have at various times, for a variety of reasons use a carabineer to secure a Newswear pouch to the outside while in transit. I have also use a Velcro securing strap to lash a fleece vest or water proof shell to the outside of the bag when walking through an airport.

I'll end this review of the Mountainsmith Correspondent with its ability to withstand Mother Nature. At the base of the Correspondent, on the front main flap, is a raincoat tucked away in it's own pocket. Affixing the raincoat is ease and can come in very hands when weather turns on you in a hurry!

If I could change two minor features in the bag they would be this
1) Make the retractable handle I use when rolling the bag 2" (5cm) longer, but that is a common request I have for nearly every rolling bag I have used.
2) Have the front entry flap open to the side instead of out to the front. This is a personal preference as I know many people prefer the 'lay-flat' front entry.

For my purposes the Mountainsmith Correspondent has an excellent bag. I look forward to continuing to schlep this bag through airports with me when my travels require me to use a rolling bag.

Below are a few detail photos of my Mountainsmith Correspondent. These photos show certain details of the bag, as well as different ways I sent my bag up for different shooting/travel needs.

Happy Flying!

--Click Images To Enlarge Them--


10 June 2008

Think Tank Skin Pouch & Belt System : Light, Easy & Simple Solution For Traveling With Your Camera Gear

Web: www.fishfotoworldwide.com -- E-Mail: fish@flyingwithfish.com

9/06/2008 – Think Tank Skin Pouch & Belt System : Light, Easy & Simple Solution For Traveling With Your Camera Gear

It's no secret that I like to travel quick and light. I am always searching for better ways to bring more equipment, in less space, in a more comfortable manner. For years I used the Newswear belt system and pouches, for a light and compact travel. The Newswear Pouches are rugged, well designed, unpadded and met most of my needs. I often wished there was a "Newswear on steroids" pouch system that met my basic requirements, but gave me that "5%" more I was seeking, the solution to my needs has now been found in the Think Tank Skin pouch system.

I received my Think Tank Skin Set in April, and now a little less than two months after affixing four of the pouches to the Think Tank "Belly Dancer" belt/suspenders, this kit has now flow with me for approximately 45,000 miles. In this short amount of time I have tested the Think Tank Skin pouches, and belt/suspender, system in Frankfurt, Paris, Amsterdam, Incheon, Beijing, Hong Kong (twice), Philadelphia, New York, Boston and Washington DC. After all this travel I can safely say I love this system!

My 'kit' of the Think Tank Skin Set consists of the Skin Strobe, Skin 50, Skin 75 and Skin Chimp Cage. These four pouches allow me not only the ability to carry what I need, but also carry it very comfortably and protect it from the elements.

The design of the Skin pouches is simple. The interiors of the larger pouches have Velcro interiors with supplied dividers. This allows you to custom configure your interior to your specific needs. The oversized closure-flap has an exterior zip pocket that is ideal for "AA" batteries, smaller camera batteries, lens caps (the exterior pocket of my Skin Chimp Cage holds a Manfrotto 3007 compact table-top tripod and extension post!)

On the exterior of the pouch, but still covered by the closure-flap is an open 'drop pocket' with Velcro closure. These pocket has been great for larger batteries, such as Canon 1D batteries, ETTL flash cords and the all import need to carry candy bars that you can access and eat quickly while you shoot (WARNING: To not place Cadbury Crunchie Bars between a long lens in the pouch and "AA" batteries in the flap, the delicate nature of the Crunchie Bars they will crumble!)

A brilliant feature of the Think Tank Skin pouches is the ability to 'eliminate' the Velcro sound from the opening and closing of the top flap. This feature has come in extremely handy while shooting weddings. While working in small intimate ceremonies in both Paris and Boston I loved being able to work out of my pouches without the need to go hide in a corner while opening my pouch flaps. The interior Velcro can be flipped 'closed' leaving the pouch flaps 'unlocked,' but allowing the freedom to work in and out of your pouches without fear of everyone staring at you when you reach for a lens. This ability to silence the opening and closing of your pouches is really a great feature for not only wedding photographers, but also corporate and political photographers as well.

One very subtle feature of the Skin pouches often seems to go unnoticed by those who use the system until the need to use it.....the attached sealed rain cover! I had not paid attention to this important feature until I walked outside into a driving rain in Washington DC. This included feature is fantastic!

My kit is attached to the Think Tank Skin "Belly Dancer belt/suspender system. At first I didn't think I'd like the Belly Dancer. While I loved the Newswear Belt System, I was not a fan of the Chest-Vest system. With the Belly Dancer I have found my own way of wearing the system. Occasionally I wear the system as "suspenders" with the pouches in front, however I find I more commonly wear the Skin Set on my right hip, with the strap on my right shoulder and the buckle clipped on my left hip.

I find wearing the Skin Set on my hip gives me not only more comfort for how I work, but I also have less "odd looks" when wearing it in places like airports, or while shooting subjects in front of 'sensitive buildings' such as an Embassy or large public facility like a train station. The less I get watched by security while I am working, the less I am likely to be approached, and thus the more time and less hassle I have to create the images I am seeking to create.

Had I designed a pouch set for myself, to meet my specific needs of not only shooting, but also traveling with all my equipment as carry-on baggage only, I could not have designed a more desirable kit than the Think Tank Skin Set.

.......Stay tuned for tips on how to carry this kit on-board with you when you are limited to one carry one bag!

If you like waist packs (and I still absolutely love my Mountainsmith Tour, this does not replace that set up) and/or you use pouches on a belt system, chances are you'll love this set up!


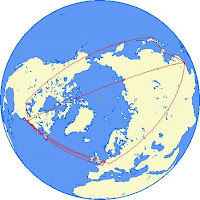
Below are two photos of me wearing the Think Tank Skin kit. The first photo is of me wearing the Skin kit as it is intended to be worn, which is ideal for climbing. The second photo is of me wearing the Skin kit the way I usually wear it when shooting, which is having the kit strapped to my right hip. Along with these two photos is a photo of a 'rough map' of where my Think Tank Skin Set has flown since I received it less than two months ago.

Happy Flying!

--Click Images Below To Enlarge Them--


23 April 2008

Incredible Pocket Sized Tripod : The Manfrotto 3007 Kit

Web: www.fishfoto.com -- E-Mail: fish@flyingwithfish.com

23/04/2008 - Incredible Pocket Sized Tripod : The Manfrotto 3007 Kit

After posting about the Ultrapod II in mid-February, on Flying With Fish, I received quite a few messages asking me if I had tried the Manfrotto 3007 tabletop tripod. In the weeks following my post the folks at Bogen/Manfrotto sent me the complete Manfrotto 3007 kit, including the 3007 Tabletop Tripod, 482 Mini-Ballhead, 3007x Extension Post and Bogen 345 Bag to test out and take on the road.

Since late March I have been using my Manfrotto 3007 kit extensively on trips throughout the United States and around the world. I initially used the 3007 as a hidden light stand on engagement sessions shoots in Philadelphia, San Francisco and later a bridal session in Hong Kong; and I also used the 3007 for a series of industrial architecture shoots in in the past few weeks in Philadelphia, Frankfurt, Incheon and New York City. I have to say that I love this pocket sized tripod!

The Manfrotto 3007 is very different than the Ultrapod II and they seem to do two very different jobs in my kit set up. I have been able to find unique uses for both tripods, but overall the Manfrotto 3007 is extremely versatile, very compact, exceedingly easy to travel with and able to withstand a significant weight load stably at unusual angles.

Any compact tripod can double as a compact light stand, this is fairly easy. I often place a small light behind my subjects for some added backlight, and the Manfrotto 3007's unique auxiliary extension post, that adds approximately 6-to-10 inches is great for fine tuning the secondary back light in tight spaces.

The real test of any compact tripod is to be able to stably hold the weight of a full-size camera with a heavy lens. Throughout my projects I have used the Manfrotto 3007 and the 482 mini-ballhead to hold a Canon 5D, with BG-E4 grip, with some heavy lenses, including the Canon 14f2.8,16-35f2.8, 24f1.4 and 24f3.5 tilt-shift at some very precise angles for some long exposures. Some shots were made with the 3007x extension post, others without, either way the tripod and the head held these heavy camera/lens combinations flawlessly.

I don't think I could have ever imagined using such a compact, lightweight, tripod for such precise work with the sets ups I was using in the past. The full range ball-head gives top notch profession precision and flexibility, while the overall kit can be disassembled and easily carried in your back pocket (not that I suggest trying to sit down with a disassembled tripod in your back pocket).

While the supplied carry-case is not my ideal design, it does it's job. Two individual slots hold the tripod with head and the extension post separately. This makes the ultra-quick set up and tear down easy. The belt loop on the back is perfect for attaching to any belt system,or lashing it onto a bag such as the Mountainsmith Tour or the Newswear belt system.

At approximately US$80 for the complete kit, I can't see why anyone wouldn't add the Manfrotto 3007 to their kit!

Below are two photos of my Canon 5D w/24f1.4 attached to the Manfrotto 3007 while shooting the Incheon Transportation Center, in Incheon, South Korea. Along with these two photos is a photo shot from this set up.

Happy Flying!

--Click Images To Enlarge Them--